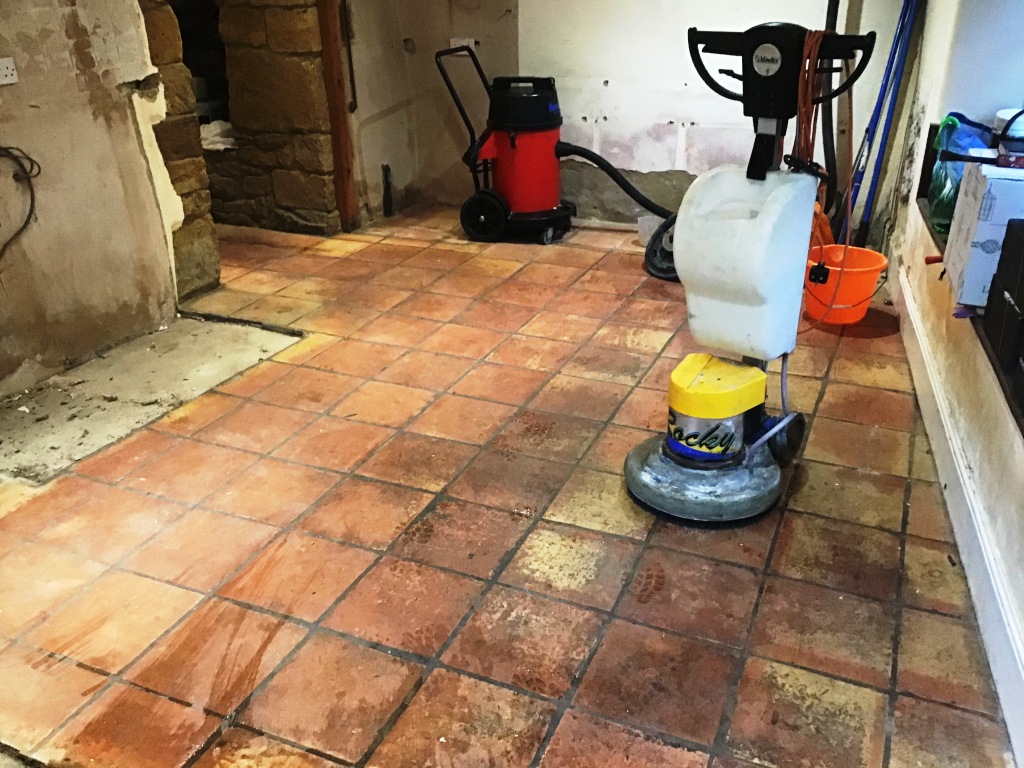
The following photos are of a Terracotta floor restoration I carried out in the picturesque village of Flore, situated between Northampton and Daventry. I was asked to assess the potential of the Terracotta floor in an old cottage, the clients had always liked the floor but didn’t want the bad condition of the tiles to detract from the effect of the beautiful new kitchen they were planning to install. They needed reassuring that it would be possible to restore the floor to a good standard and thereby enhance the final look of the new kitchen before they went to the expense of replacing the entire floor.
Whilst I was there, I carried out a test clean to a small area of floor, stripping off all old the sealers to expose the natural blemish free face of the tile. Having worked out a process for restoring the floor I was also able to come up with an accurate price for completing the floor. I left the quote with the customer and was pleased to hear back from them a few days later to let me know they had decided to go ahead with the restoration of their floor.
 |
 |
 |
Before being able to set a date for my return I had to liaise with for the kitchen company to agree a date them to come and remove the old kitchen and install the new. I would slot in-between the two dates.
Stripping Terracotta Kitchen Floor Tiles
When returned to the do the work the kitchen had been stripped out as promised and with no kitchen units etc. to protect from splashing, I was able to get straight on with the cleaning of the floor using Tile Doctor Oxy-Pro alkaline tile cleaner.

Oxy-Pro is a gel and doesn’t require a lot of water to activate it, my concern was Terracotta tiles are very porous and it helps the drying process if you keep the moisture down to a minimum, especially as this work was carried out in November. The product was scrubbed into the Terracotta tiles using a stiff brush tool attached to rotary machine. I also used grout brushes on the wide grout lines working in small sections at a time and clearing the resulting slurry with a wet vacuum as I went.

Once the cleaning process was completed across all the Terracotta, I spot treated the many stubborn stains with Tile Doctor Acid Gel, especially along the grout lines. This was brushed in, left to dwell, scrubbed and then removed with a wet vacuum. The stone was then mopped with plain water to neutralise and remove any trace of cleaning products. I then installed a fan to dry the entire area as quickly as possible.

Sealing Terracotta Floor Tiles
As the customer was not using the kitchen it provided time to leave the floor for a few days to fully dry out with a small dehumidifier left on site to assist with the drying process. I returned later to seal the floor and started by taking a damp meter reading so I could be sure the Terracotta was completely dry.

The results were good, and I was able to go ahead and seal the Terracotta using several coats of Tile Doctor Seal & Go Extra for a silk finish. Once of the reasons I picked this sealer is its breathable so it will cope with any moisture rising through the tile from the subfloor which is an important consideration on old floors which have no damp proof course.

Although I never got to see the new kitchen installed my customer was very pleased with the transformation of the floor and left the following testimonial on the Tile Doctor feedback system.
Philip did a fantastic job restoring the terracotta tiles in our kitchen. They are good as new! Philip was hardworking and excellent at communicating with us and planning the best time to do the work around our new kitchen being fitted. Highly recommend! Ayesha D.

Source: Terracotta Floor Cleaning and Sealing Service in Northamptonshire